How To Build A Deck Using TuffBlocks – A 10 step how-to-guide (Part 02)

In this blog we will cover the final steps involved with our deck build:
Step 6 - Laying Down The Joists
Step 7 - Bracing Overhang
Step 8 - Joist Protection
Step 9 - Laying Down The Decking Boards
Step 10 - Trim The Decking Boards
If you missed Part 1, click here to check it out.


As a quick recap, part 1 saw the team run you through site preparation, which involved removing the topsoil, then levelling and compacting the ground so that our TuffBlocks would sit nice and level. We also covered how to measure and cut your posts and how to check the outer frame of your deck is square and level.

Let's get started with part 2 of our how to guide!
Step 6. Layout Joists
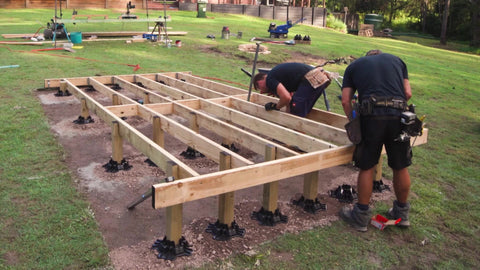
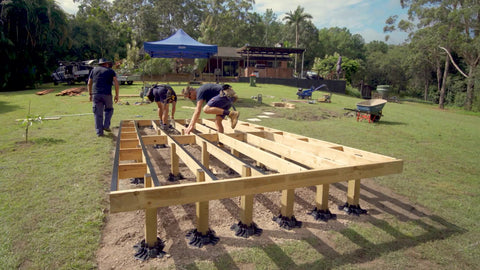
You’ve built your outer deck frame, ensured its square and now it’s time to add the joists! This step may vary from deck to deck - some of you may be working on flat ground, others may be in the same situation as our team. When building a deck on sloping ground or across variable heights, you will need to measure the distance from the TuffBlocks to the joists.
Measure the distance from the joist to the TuffBlock, when doing so ensure to take into consideration additional length for the checking technique (please see Part 1, step 4)
Place the joists into the joist hangers - we used galvanised nails and repeated the following:
- Lay down road base
- Tamp to compact and level ground where TuffBlock will sit
- Measure height for post
- Cut posts
- Repeat until you’ve built out the majority of your frame


Step 7. Bracing Overhang
Due to our deck design we’ve decided to hide the TuffBlocks so that they’re not visible beyond the outer frame. Our Tuffblocks are sitting 30.5cm by 30.5cm within our frame hence why we need to brace the overhang to create extra support for our unsupported outer joists. For a more finished and polished aesthetic we’ve decided to add fascia boards to the sides of the deck.


Step 8. Joist Protection
To promote the longevity of our deck we are adding a protective barrier. There are a number of joist protection systems out there, from PVC rolled covering, but in this instance we have used joist protection tape which uses a special all weather adhesive to cover the joist and remove water between your decking and your frame - so it’ll help to stop any mildew or rot. We’ve placed the joist protection tape across each of the joists.


Step 9. Laying Boards
Once you’re certain the deck frame is square, level and the joist protection tape is laid out across your joists… it’s time to lay out the decking boards.
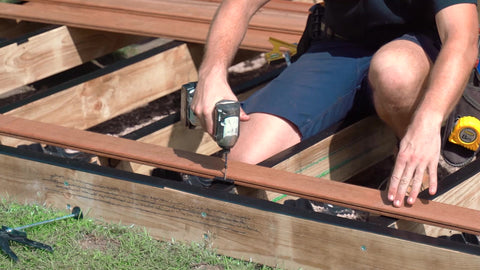
Our team is opting for a clean decking style - we’re using an invisible nail system. This consists of a series of deck spacers, which are then placed into the grooves of our decking boards. Each deck spacer will be screwed into each joist and decking board with a countersunk screw.
It's important to note that when placing your end deck spacers into the grooves of the decking boards, that you’re mindful of no overhang. We want to prevent overhang so that when we trim the decking boards, we don’t hit the plastic deck spacer.
When preparing to lay out all the decking boards, you’ll most likely notice that your timber cuts will vary in length. To kick off our decking, we’ve laid out a few of our longer timber cuts. To ensure our shorter cuts aren’t grouped all together at the end of our decking, we’ve popped them down about 4 decking boards in. When popping the two shorter cuts together, it’s important that the join line sits above a joist and sits nice and tight to keep that clean look. To ensure our shorter cuts are sitting tight and centred, we’ve tapped the ends of our shorter cuts so that the join line meets nice and clean.
At this point in our deck build we added stairs for better accessibility of the entire outdoor living space. We utilised leftover timber to prevent wastage of materials.


You can add fascia boards to the sides of your deck for a cleaner look and then it’s time to treat and decorate your deck!


We decked out our deck with a gorgeous 5 seater outdoor sofa set, cushions, a simple centrepiece as well as a soft blanket for those cooler evenings under the stars.
What are you waiting for? Get building!


Leave a comment